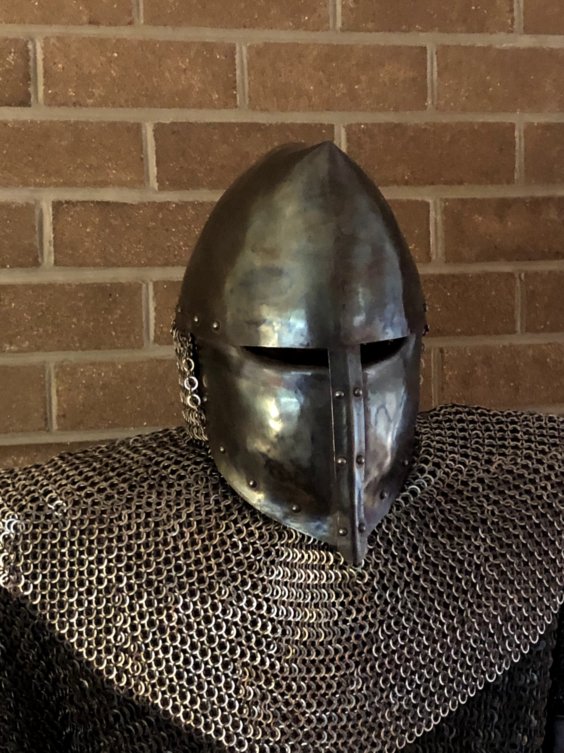
Italo-Norman Helmet
As a COVID quarantine project I decided to make a SCA-legal helmet out of 4130 steel hardened and tempered.
While not up to the quality and design of more experienced armorers, this was a great project that really
pushed me out of my crafting comfort zone and gave me the opportunity to practice a lot of new techniques. I owe thanks
to Sir Tascius for his encouragement and feedback along
with the craftsmen on the United League of Armourers
Facebook group who were incredibly generous with their time and knowledge.
||
|-|-|-|
| |
| |
| |
|
Material Selection:
4130 is a chromium-molybdenum alloy steel that is hardenable, easy to weld, and readily available in the US since it is used in a lot of commercial applications. All of those characteristics make it a superior choice for armor in all ways except rust resistance. For both safety and durability I prefer a heavier helmet so this projected started with sheets of 2 millimeter 4130 purchased online from McMaster Carr.
- All About 4130 Steel (Properties, Strength, and Uses)
- Hardened and Hardenable Metals Suitable for Making Armor
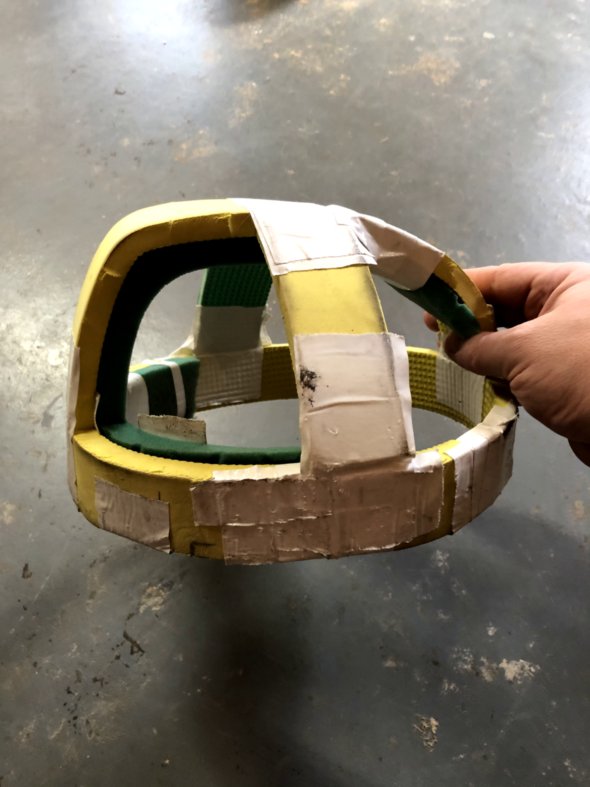
Patterning & Cutting:
To pattern the helmet I started by making a foam skull cap as thick as the padding to be used in the finished helmet. From there I was able to measure and cut cardboard templates of the various pieces, transfer them to the steel with a Sharpie, and cut out the forms with a hand-held jigsaw. Cutting the pieces with a jigsaw was less than ideal with flying metal shards and constant oiling of the cut. I’ll be looking to upgrade to a Beverly Shear as soon as I can.
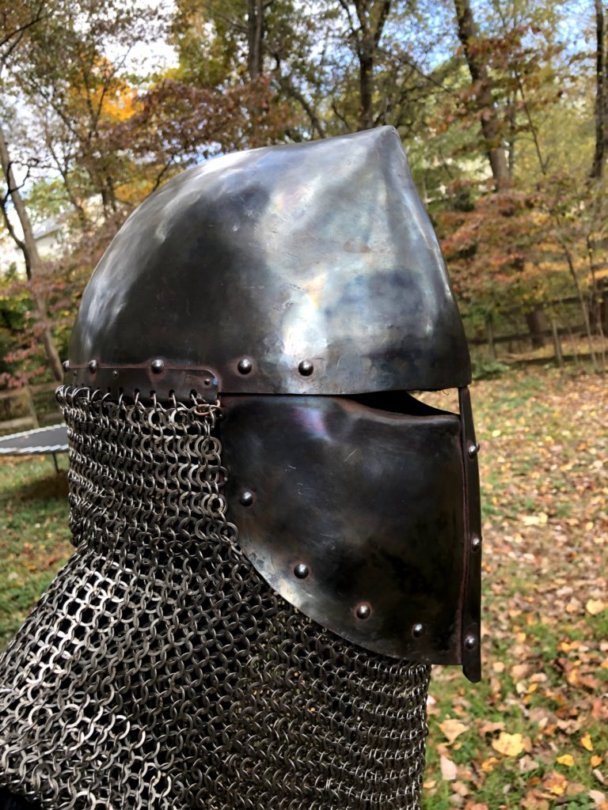
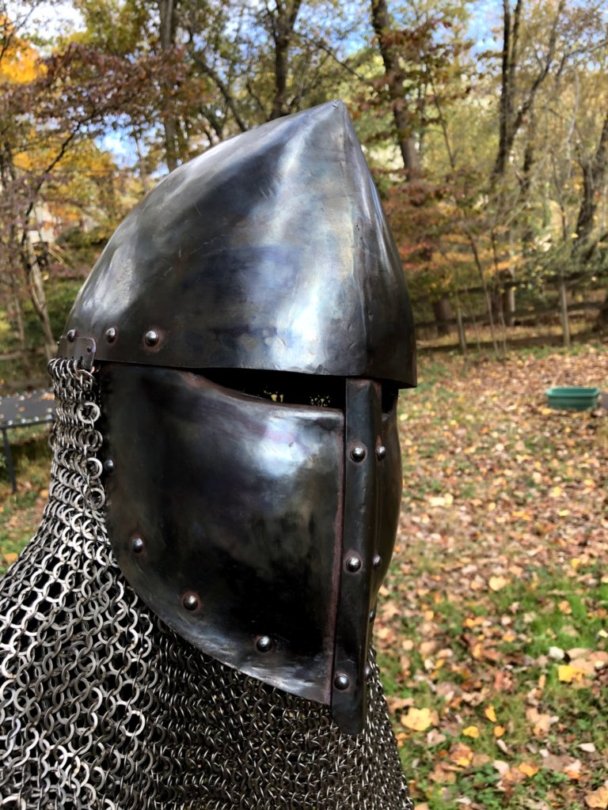
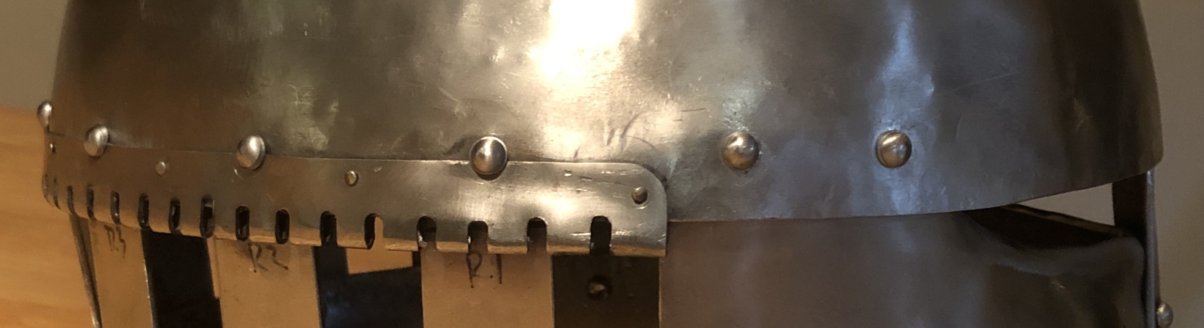
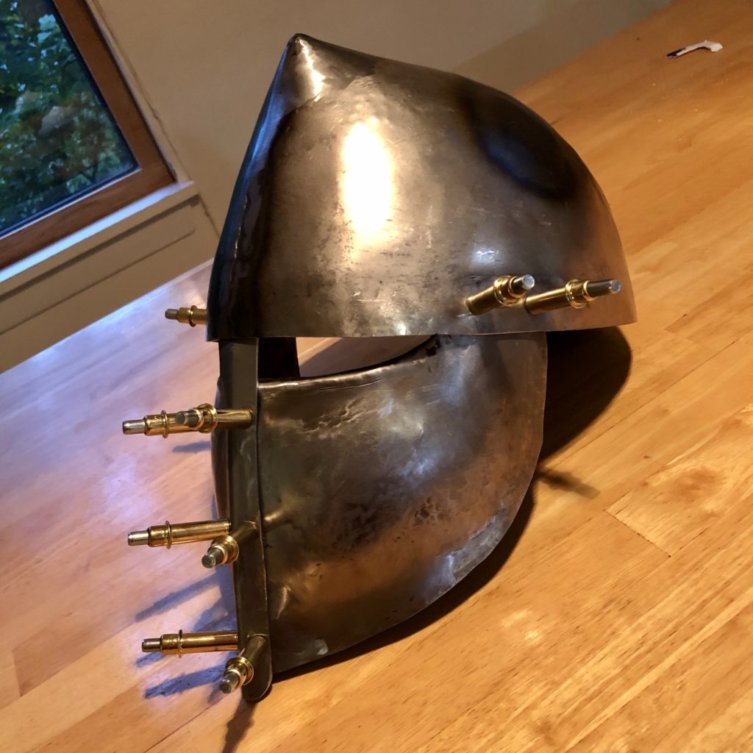
I was trying to approximate a forward point Italo-Norman crusader helm with a full face plate. While not being terribly worried about a strictly authentic design I wasn’t sure how to best attach the aventail to the back of the helmet. This article, Methods of Mail Suspension Used on Early Medieval European Helmets, by Tomáš Vlasatý provided excellent examples and everything I needed to accomplish the task. I settled on an approach that uses an attached band of metal with teeth bent inwards to form eyelets for a wire hanger. Although a little more effort, this approach seems like it will be a more durable long lasting solution than the leather hangers commonly seen on the SCA field.
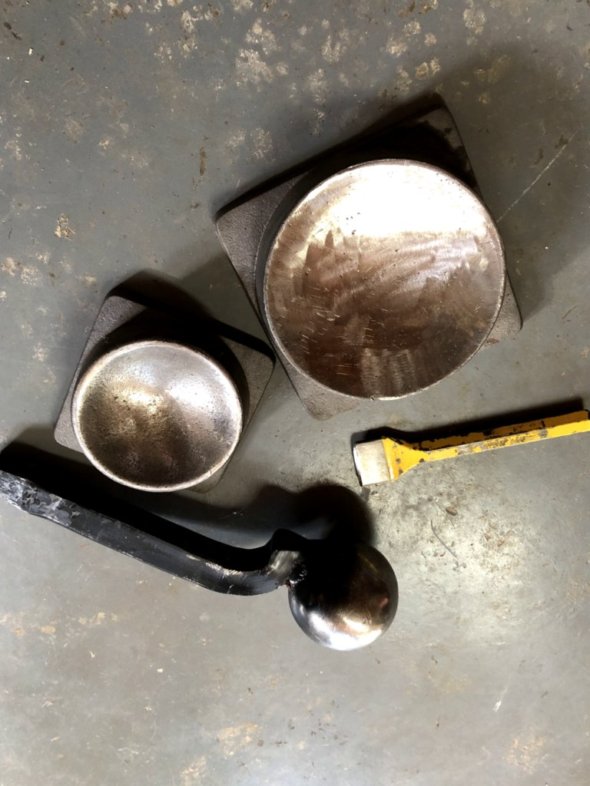
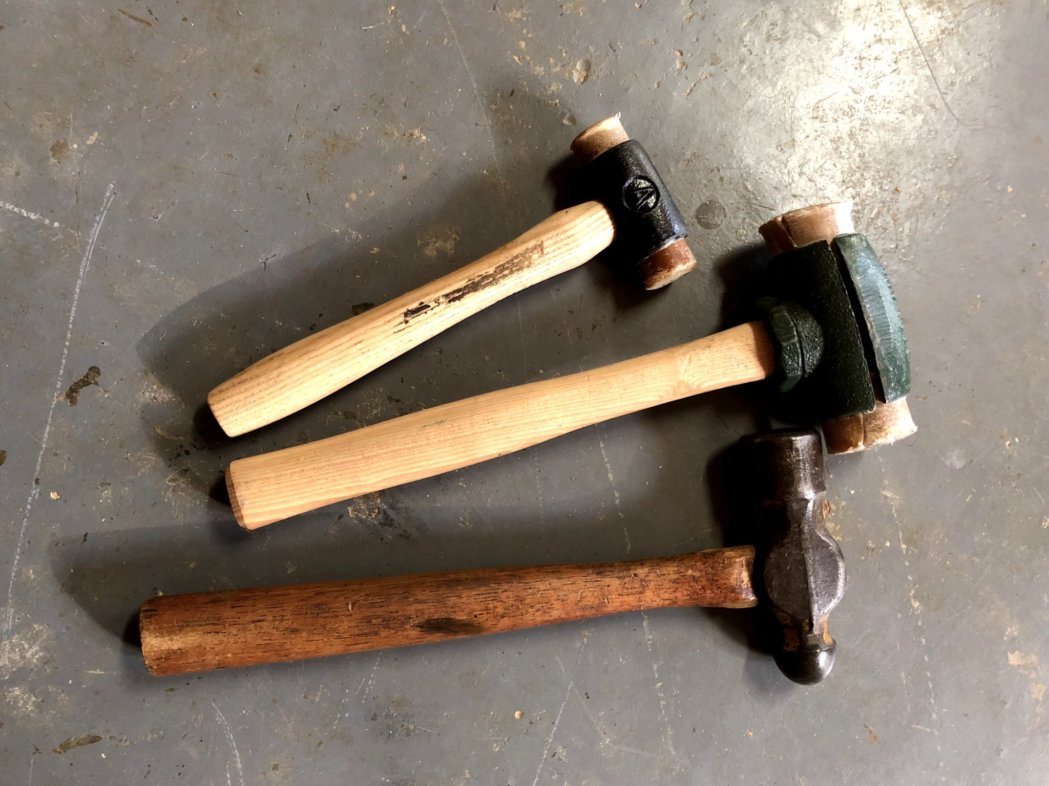
Shaping:
This helmet was mostly worked cold over dishing forms, a large ball stake, a dulled masonry chisel, and the edge of my
stump. Getting the two helmet halves to line up precisely at the point took a lot of tweaking and trimming but I was
eventually able to close all the gaps up to under 1 millimeter.
||
|-|-|-|
| |
| |
| |
|
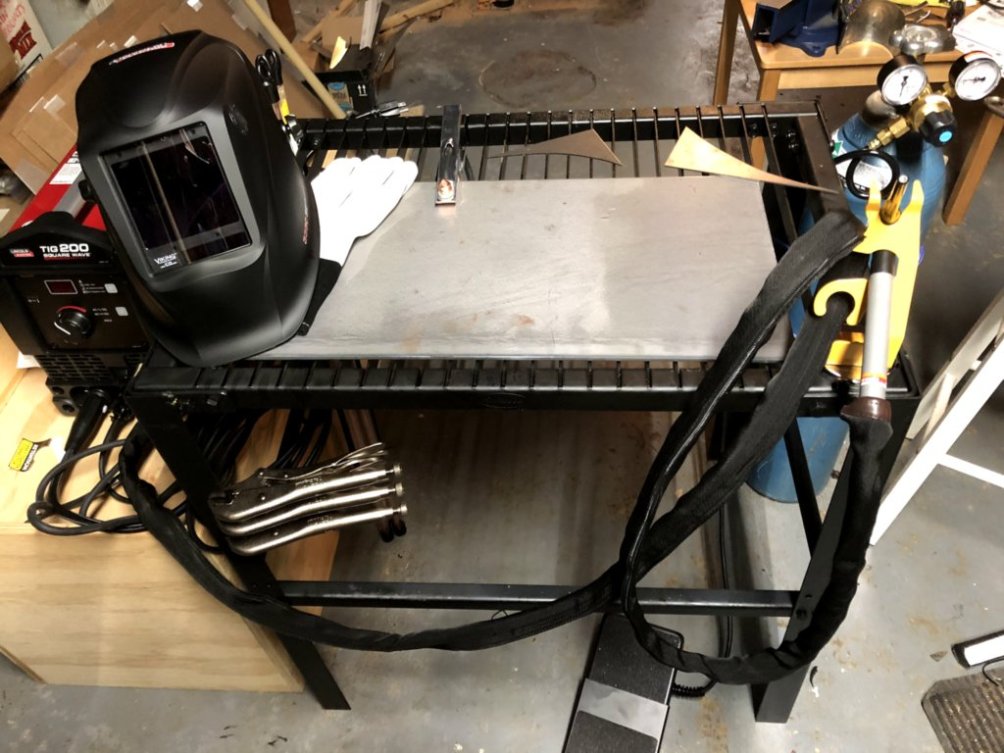
Assembly:
The biggest challenge of the assembly was welding the two helmet halves together. I wanted the weld to be of the same
4130 steel I used to form the rest of the helmet to prevent any cracking or soft spots after hardening.
That took me into the realm of Tungsten Inert Gas (TIG) welding
which is a rabbit hole far beyond the scope of this page. After watching several videos and practicing on scrap metal, I was able
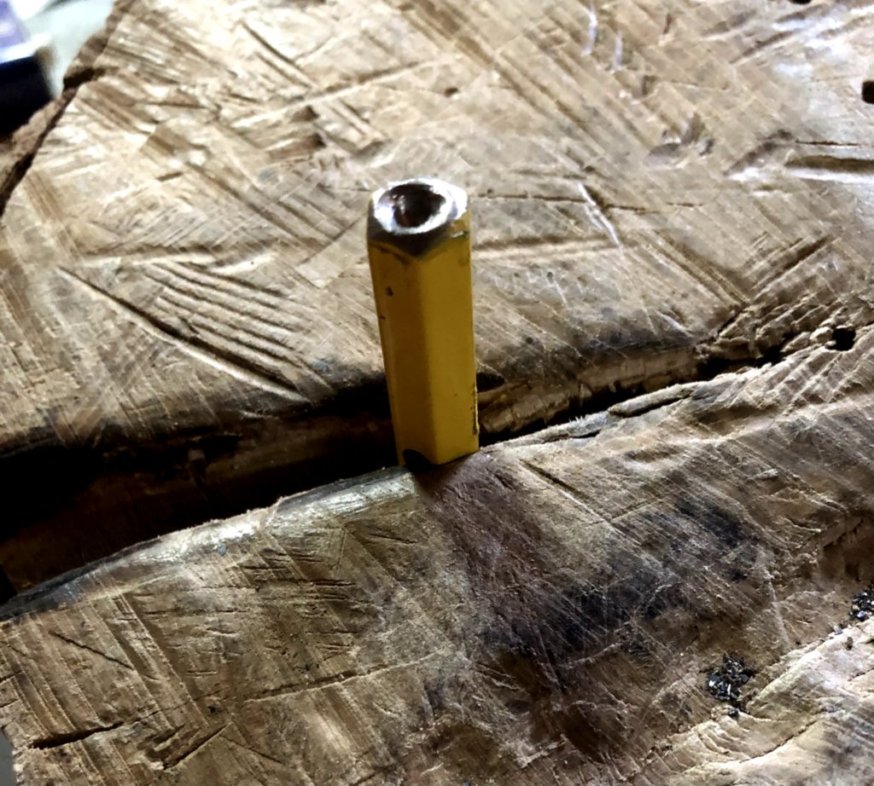
to fuse pieces of 4130 together well enough so that I could not break them apart with a hammer. After that the riveting was
fairly painless aided by a set of Cleco Fasteners and a raised rivet
setter I made out of an old punch.
||
|-|-|-|
| |
| |
| |
|
Additional Resources and Materials:
- Rivets: McMaster Carr remains my go-to online shop for various materials. They have a wide range of solid steel rivets available for all my project needs.
- Aventail: The stainless steel aventail was sourced from Gordon Osterstrom of weldedchainmail.com. He was very easy to work with and quickly shipped my order from in stock items so it was ready to go as soon as I was.
- Welding Knowledge: With quarantine limiting my options I relied on YouTube videos to learn the basic concepts of TIG welding. I watched several and was impressed with instructors willingess to teach and demonstrate the techniques in a free media format (e.g Introduction to TIG Welding Video ). I’d like to take a welding class at the local community college or maker space once I am able.
- Welder: There are a lot of online debates over who makes the best welding equipment and a wide range of prices. I ended up selecting a Lincoln Electric TIG 200 which is on the expensive end of the spectrum but a quality machine that will cover all of my current and future welding needs.
- Argon: I’ve had an account with Roberts Oxygen Company from back in my SCUBA diving days. It was nice to get an argon tank refill for a typical use without needing to explain how it would be used in a drysuit.
- Filler Rods: Finding a filler rod that matched the 4130 alloy I was using ended up taking some searching. I eventually found Arc Zone which had a nice selection of 4130 welding rods.
Finish and Polishing:
This is where my lack of experience really shows on the finished product. I don’t have a lot to offer here but note that I learned the value of sanding and polishing my tools after I had completed this project. Every little imperfection in my hammer or dishing form left marks on the helmet that I had to work to buff out. An angle grinder with flap disks and scotch bright pad wheels was a life saver. I hope to set myself up for less work on future efforts.
Heat Treatment:
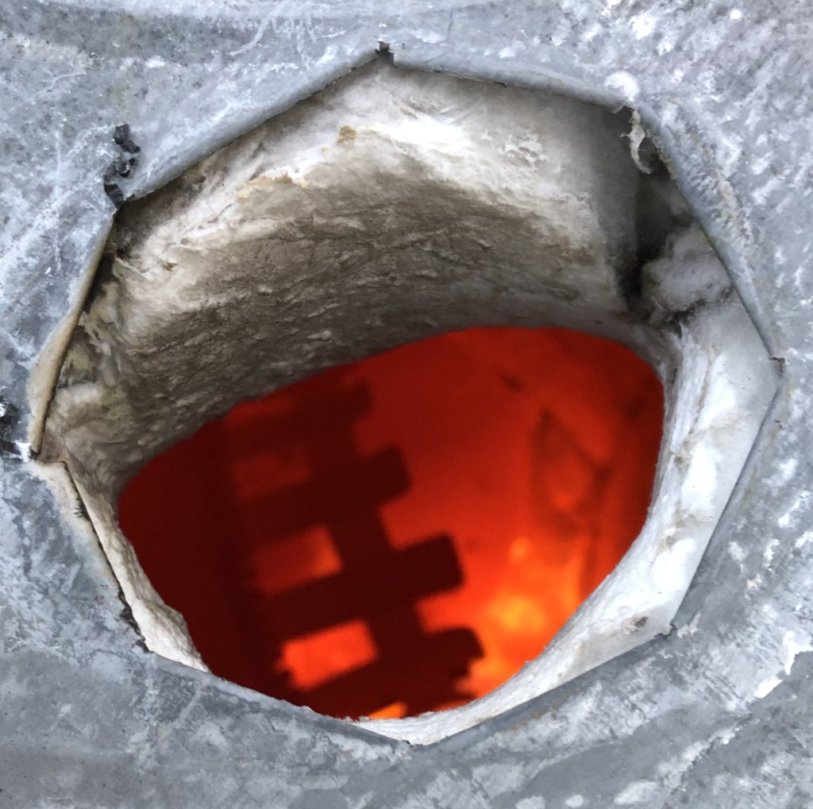
For hardening I followed the schedule suggested by Craig Nadler which required heating the assembled helmet to 1650F-1700F and then quenching in water. Then the helmet was tempered in the kitchen oven for 30 minutes at 550F after cleaning the scale off the helmet with vinegar and a scrub brush. The initial heating was completed in my Trashcan Kiln with temperature measured using a high temp infrared thermometer.
The quench was a little tricky to get right. The goal was to fully submerge the helmet without forming any trapped air
pockets. I ended up suspending the helmet by two wires, one running through the slats at the rear of the helmet and a
second attached at the tip of the faceplate. Putting the helmet in the water was a sort of scooping motion that
ended with the helmet completely upside down in the tank.
||
|-|-|
| |
| |
|